
All Safe Codes in Resident Evil Requiem Solution
Every safe code in Resident Evil Requiem: Bar & Lounge, Examination Room, Basement, Sterilization Chamber, and Monitor Control Room — Normal and Insanity combinations, locations, and rewards.
- Location
- Care Center and ARK
- You need
- Find the safeCode clue for the Basement safe requires Leon's Attic segment
- Reward
- Antique Coins, Raccoon Roundup Map, Med Injectors, Molotov, ammo
Care Center and ARK
Easy
Antique Coins, Raccoon Roundup Map, Med Injectors, Molotov, ammo
- Find the safe
- Code clue for the Basement safe requires Leon's Attic segment
Find the safe
All five safes are fixed locations — see the list below for each room.
Enter the combination
Dial safes use left/right directions, e.g. 10L-80R-30L means turn to 10 left, 80 right, 30 left.
Collect the reward
Each safe holds fixed loot; opening all five unlocks the 'No Safe is Safe' trophy.
Resident Evil Requiem has five combination safes, all in Grace’s sections of the Care Center and the ARK. Combinations are fixed, but Insanity difficulty uses different codes. Opening all five unlocks the No Safe is Safe trophy.
How to Read the Codes
Safes are dial locks. A code like 10L-80R-30L means: turn to 10 (left), then 80 (right), then 30 (left).
All Five Safes
1. Bar & Lounge Safe — Care Center, West Wing (behind the bar)
- Normal: 10L-80R-30L
- Insanity: 20R-50L-30R
- Reward: 3 Antique Coins
- Code clue: a file in the Office / Custodian’s Office 2F
2. Examination Room Safe — Care Center, East Wing
- Normal: 30R-10L-50R
- Insanity: 50L-30R-90L
- Reward: 3 Antique Coins
- Code clue: near the lockers outside the Conference Room
3. Basement Safe — Care Center Basement
- Normal: 60R-40L-80R
- Insanity: 70L-50R-20L
- Reward: Raccoon Roundup Map + Handgun Ammo
- Code clue: only obtainable as Leon in the Attic warped cabinet segment
4. Sterilization Chamber Safe — ARK
- Normal: 10R-90L-20R
- Insanity: 80L-50R-0L
- Reward: Molotov + Med Injector + Handgun Ammo
5. Monitor Control Room Safe — ARK
- Normal: 50L-60R-80L
- Insanity: 20R-0L-70R
- Reward: Med Injector + Empty Bottle + Bottle of Acid
- Code clue: inside a Bioweapon Repository 05 shipping container
Tips
- The Basement safe is easy to miss: its clue is in Leon’s segment, so note the combination when you see it — Grace opens the safe later.
- On Insanity, write down the new combinations as you find them; every code changes.
- Antique Coins from the first two safes feed the coin-spending unlocks, so prioritize the Care Center safes early.
Next Steps
If you are working through the Care Center, the Quartz puzzle boxes are the main progression gate. In the ARK, keep an eye out for the endings guide before the final choice.
Frequently Asked Questions
How many safes are in Resident Evil Requiem?
Five. Four are found across the Care Center and the ARK as Grace, and the Basement safe's code clue is only obtainable during Leon's Attic segment.
Do safe codes change between playthroughs?
No. Each safe has a fixed combination, but the Insanity difficulty uses different codes from Normal/Standard.
What does opening all safes unlock?
Opening all five safes unlocks the 'No Safe is Safe' trophy.
Where is the Bar & Lounge safe?
Behind the bar in the Care Center West Wing. Normal code: 10L-80R-30L. Insanity code: 20R-50L-30R. Reward: 3 Antique Coins.
Where is the Basement safe code clue?
The code itself is in the Basement, but the clue is only obtainable as Leon in the Attic warped cabinet segment.
Related Puzzles
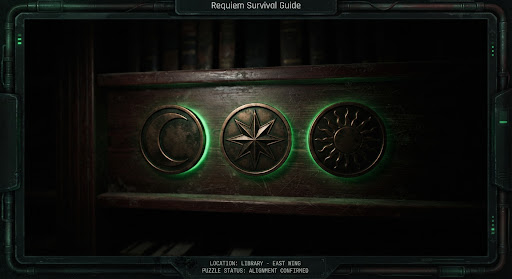
Moon Quartz Puzzle Box Solution
Complete Resident Evil Requiem Moon Quartz Puzzle Box solution: Chairman's Office location, Pencil item, symbol sequence Moon → Sun → Star → Moon, and reward.
Sun Quartz Puzzle Box Solution
Need the Sun Quartz in Resident Evil Requiem? Find the puzzle box location, the Corrosive item, the Star → Sun → Moon → Sun code, and what to do next.
Star Quartz Puzzle Box Solution
Resident Evil Requiem Star Quartz solution: Security Manager's Office location, Level 2 Wristband to enter the Isolation Ward, Level 3 from the Security Manager's body to free Emily, why Emily must read the Braille, and the Star → Star → Moon → Sun code.